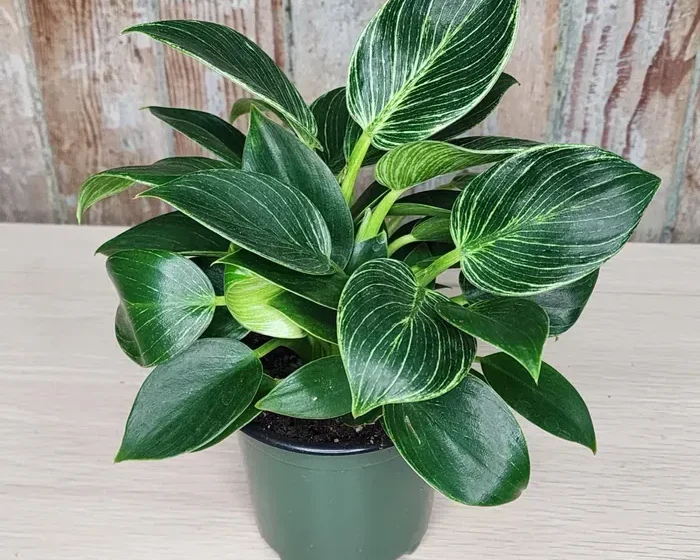
Philodendron Birkin Propagation, with its unique white and green variegated leaves, is a rewarding experience, especially for beginners! Whether you want to expand your plant collection or share with friends, this step-by-step guide will make the process enjoyable and successful.
Why Propagate Philodendron Birkin?
Propagation is a practical way to nurture a deeper connection with your plant. Here’s why it’s worth your time:
- Cost-Effective: Skip the nursery and grow your own plants at home.
- Bonding with Nature: Growing a new plant from a cutting fosters a fulfilling sense of care and achievement.
- Aesthetic Boost: Increase the greenery in your home or office by adding more of these gorgeous plants.
Tools and Materials Needed
Before you begin, gather these simple supplies:
- Healthy Philodendron Birkin plant (with strong stems and healthy leaves)
- Sharp, sterilized scissors or pruning shears
- Small glass container or jar
- Filtered water
- Potting soil (well-draining)
- Small pot or container with drainage holes
- Optional: Rooting hormone powder for a faster rooting process
Step 1: Choose the Right Stem Cutting
The first step in propagating Philodendron Birkin is selecting the right cutting:
- Look for Healthy Stems: Find a stem with a few leaves, ideally 3-5 inches in length.
- Find a Node: Nodes are the small bumps where roots will emerge, essential for successful propagation.
Tip: Choose cuttings from healthy plants free of any pests or diseases.
Step 2: Make the Cut
Once you’ve selected the stem, follow these steps:
- Prepare Your Scissors: Clean your scissors with rubbing alcohol to prevent any infection from transferring to your new plant.
- Cut Just Below a Node: Carefully make a clean cut just below the node at a 45-degree angle. This angled cut increases the surface area, which may help rooting.
Step 3: Place the Cutting in Water
Now that you have a cutting, it’s time to start the rooting process.
- Fill a Small Jar with Water: Use filtered or distilled water for best results.
- Place the Cutting in the Jar: Ensure the node is submerged while keeping the leaves above water.
- Change the Water Regularly: Every 3–5 days, replace the water to keep it fresh and oxygenated, promoting healthy root growth.
Tip: Place the jar in indirect sunlight to prevent the cutting from wilting or burning.
Step 4: Wait for Root Development
Roots can start to form within a week or two but may take up to four weeks for substantial growth.
- Ideal Root Length: Wait until the roots are about 1–2 inches long before moving to soil.
- Patience is Key: Don’t rush this stage; let the roots grow enough to handle soil transition.
Step 5: Transfer to Soil
Once the roots are developed, it’s time to plant the cutting in soil.
- Prepare the Pot and Soil: Choose a small pot with drainage holes and fill it with a well-draining potting mix.
- Create a Hole: Gently make a hole in the center of the soil to place the cutting.
- Place the Cutting in Soil: Carefully position the cutting so the roots are fully covered in soil, but don’t bury the leaves.
- Water Lightly: Moisten the soil without overwatering to help the plant settle.
Tip: Avoid direct sunlight for the first few weeks after transplanting; indirect light will reduce stress on the new roots.
Step 6: Care for the New Plant
Now that your new Philodendron Birkin is potted, it’s essential to provide the right care to encourage healthy growth.
- Light: Place in bright, indirect sunlight. Philodendron Birkins thrive in this type of light.
- Watering: Water moderately, allowing the soil to dry out between waterings. Too much water can lead to root rot.
- Humidity: Maintain a humid environment (above 50%) by misting or using a humidity tray.
- Fertilizer: During the growing season (spring and summer), use a balanced liquid fertilizer every month.
Troubleshooting Common Issues
- Yellowing Leaves: Yellowing leaves can indicate overwatering or too much direct sunlight. Adjust watering habits and move the plant to a less intense light source.
- No Roots Forming: If roots aren’t forming in water, try adding a pinch of rooting hormone or switch to soil propagation.
- Leaf Wilting: Wilting may occur if humidity levels are too low. Mist your plant or use a small humidifier nearby.
Benefits of Propagating Your Own Philodendron Birkin
Besides the satisfaction of watching your plant thrive, propagation has some great benefits:
- Low-Cost Plant Expansion: Instead of buying more plants, you can create your own new Birkins for free.
- Gifts for Friends: A homegrown plant makes a thoughtful, eco-friendly gift.
- Practice Your Skills: Each propagation helps you refine your skills and learn more about plant care.
FAQs
1. Can I propagate Philodendron Birkin directly in soil?
Yes, you can propagate directly in soil. Follow the same cutting steps, dip the node in rooting hormone, and place it in well-draining soil.
2. How often should I water my newly potted Philodendron Birkin?
Water sparingly; let the top inch of soil dry out before the next watering.
3. What should I do if my cutting starts wilting?
Check humidity levels, ensure the node is submerged, and move the cutting to indirect light to prevent stress.
Conclusion
Propagating a Philodendron Birkin doesn’t need to be intimidating! With these straightforward steps, you can successfully grow your own Birkins, expanding your plant collection and gaining confidence in propagation. Each new plant you grow from a cutting is a testament to your care and patience—enjoy the process, and watch your indoor garden flourish! For more visit Fast Panda


