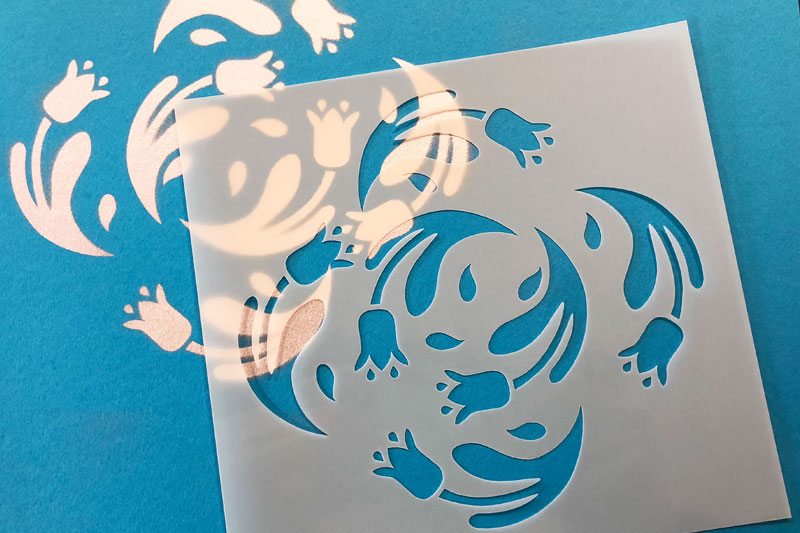
Creating your own unique designs for DIY projects, personal branding, or decor can be a challenge, especially if you’re trying to achieve precision. Enter custom stencils—a simple yet powerful tool that opens the door to countless creative possibilities. Whether you’re decorating a nursery, adding flair to a business sign, or personalizing gifts, custom stencils make intricate designs easier to achieve. But how do you get started, and what do you need to know? Let’s explore everything about custom stencils, from their applications to tips on designing your own.
What Are Custom Stencils?
Custom stencils are templates made to create specific designs, patterns, or text. Unlike store-bought stencils with standard designs. Custom stencils are tailored to the user’s preferences, allowing for a unique personal touch. They can be used with paints, inks, or even etching tools on a wide range of surfaces.
Why Use Custom Stencils?
Ever tried to freehand a complex design? It can be time-consuming and prone to errors. Custom stencils offer an efficient solution, allowing anyone—artist or beginner—to create detailed images and text. They provide accuracy and ease, making them ideal for projects like wall murals, business branding, and detailed DIY crafts.
Types of Custom Stencils
Custom stencils come in various forms to suit different applications. Here’s a quick look at the most common types:
- Single-Use Stencils: Made from paper or thin plastic, these are ideal for short-term projects.
- Reusable Stencils: Often made from durable plastic, these can be washed and reused multiple times.
- Adhesive Stencils: These stencils stick to the surface, reducing the chances of paint bleeding outside the lines.
Materials Used in Custom Stencils
Selecting the right material for your stencil depends on its purpose. Here are some popular options:
- Mylar: Known for its durability and flexibility, Mylar is a popular choice for reusable stencils.
- Vinyl: Ideal for adhesive stencils, vinyl adheres well to surfaces, making it perfect for crisp, clean edges.
- Cardstock: Cardstock is budget-friendly and works well for single-use projects.
How to Make Custom Stencils
Creating a custom stencil can be as simple or complex as you want it to be. Here’s a step-by-step guide:
- Design Your Stencil: Use software like Adobe Illustrator or even online stencil makers to create your design.
- Choose the Material: Select the material based on your needs—Mylar for reuse, vinyl for adhesion.
- Cut the Stencil: Use a craft knife or stencil cutter for detailed designs. Laser cutters are also popular for intricate patterns.
Applications of Custom Stencils
Custom stencils are incredibly versatile. Here are a few ways you can use them:
- Home Decor: Create unique wall patterns, decorate furniture, or even make customized rugs.
- Branding: Businesses use custom stencils for logos on packaging, storefronts, and more.
- Events: Add a personalized touch to wedding signs, party decorations, and event banners.
Tips for Designing Custom Stencils
Designing your stencil is a chance to let your creativity shine. Here are some helpful tips:
- Keep It Simple: Detailed designs are beautiful but can be challenging to cut and paint.
- Consider Negative Space: Plan for both the positive and negative spaces in your design, as they will form the final image.
- Test Your Design: Before cutting, print a sample to see how it looks and make adjustments.
Using Custom Stencils in DIY Projects
Want to give your furniture or walls a makeover? Here’s how to use custom stencils in DIY projects:
- Clean the Surface: Make sure the area is clean to ensure good adhesion.
- Position the Stencil: Secure the stencil to prevent shifting.
- Apply Paint Carefully: Use a foam roller or stencil brush to apply the paint in thin layers.
- Lift Gently: Slowly lift the stencil to reveal your perfect design.
How to Care for Your Stencils?
Proper care ensures your stencils last. After each use, wash the stencil with warm, soapy water to remove any residual paint or ink. For adhesive stencils, avoid submerging them fully in water to maintain the adhesive backing.
Top Benefits of Custom Stencils
Custom stencils offer a unique set of advantages:
- Personalization: Make projects truly your own with designs that reflect your style.
- Precision: Achieve professional-quality results without extensive artistic skill.
- Versatility: Use them on wood, fabric, metal, glass, and many more surfaces.
Challenges and Solutions
While stencils are simple to use, they can present a few challenges:
- Paint Bleeding: Use adhesive or tape down the stencil to minimize bleeding.
- Complex Designs: Break down intricate designs into sections for easier application.
Custom Stencils for Businesses
Create Custom stencils is an excellent tool for businesses. They’re a cost-effective way to add consistent branding to packaging, signs, or promotional items. With custom stencils, you can quickly apply logos and slogans across multiple items, ensuring brand recognition.
Frequently Asked Questions about Custom Stencils
1. Can I reuse my custom stencils?
Yes, if you choose durable materials like Mylar or thick plastic, custom stencils can be reused multiple times.
2. What kind of paint works best with stencils?
Acrylic paint and spray paint are popular choices as they dry quickly and provide even coverage. Fabric paint is suitable for textiles.
3. Are custom stencils waterproof?
Many reusable stencils are waterproof, especially those made from Mylar or vinyl, which can be easily cleaned.
4. How do I prevent paint bleeding under the stencil?
Using adhesive stencils or securing your stencil with tape helps prevent paint from bleeding underneath.
5. Can custom stencils be used on fabric?
Yes! Just be sure to use fabric paint and consider heat-setting the design to make it long-lasting.


